
相信大家都知道,取得資料後能夠進行許多的應用,像是未來的趨勢預測、機器學習或資料分析等,而有效率的取得資料則是這些應用的首要議題,網頁爬蟲則是其中的一個方法。
網頁爬蟲就是能夠取得網頁原始碼中的元素資料技術,但是,有一些網頁較為特別,像是社群平台,需先登入後才能進行資料的爬取,或是電商網站,無需登入,但是要透過滾動捲軸,才會動態載入更多的資料,而要爬取這樣類型的網頁爬蟲,就稱為動態網頁爬蟲。
該如何實作呢?本文將使用Python Selenium及BeautifulSoup套件來示範動態網頁爬蟲的開發過程,重點包含:
- BeautifualSoup vs Selenium
- 安裝Selenium及Webdriver
- 安裝BeautifulSoup
- Selenium get()方法
- Selenium元素定位
- Selenium send_keys()方法
- Selenium execute_script方法
- BeautifulSoup find_all()方法
- BeautifulSoup getText()方法
一、BeautifualSoup vs Selenium
BeautifulSoup套件相信對於開發網頁爬蟲的人員來說,應該都有聽過,能夠解析及取得HTML原始碼各個標籤的元素資料,擁有非常容易上手的方法(Method),但是,對於想要爬取動態網頁資料來說,則無法達成,因為BeautifulSoup套件並沒有模擬使用者操作網頁的方法(Method),像是輸入帳號密碼進行登入或滾動捲軸等,來讓網頁動態載入資料,進行爬取的動作。
所以,這時候,就可以使用被設計於自動化測試的Selenium套件,來模擬使用者的動作,進行登入後爬取資料或滾動卷軸,並且能夠執行JavaScript程式碼,這些就是Selenium與BeautifulSoup套件最大不同的地方。對於開發Python動態爬蟲來說,就可以結合Selenium套件以上的特點,讓網頁動態載入資料後,再利用BeautifulSoup套件簡潔的方法(Method),將所需的資料爬取下來。
本文就是利用這樣的概念,利用Selenium套件登入Facebook後,前往粉絲專頁,執行滾動卷軸的JavaScript程式碼,讓網頁動態載入資料後,再使用BeautifulSoup套件爬取貼文標題。
二、安裝Selenium及Webdriver
首先,利用以下指令安裝Python的Selenium套件:
$ pip install selenium
接下來,要讓Selenium套件能夠自動開啟瀏覽器,所以需要安裝對應的Webdriver(驅動程式),本文將以Chrome瀏覽器來做示範。
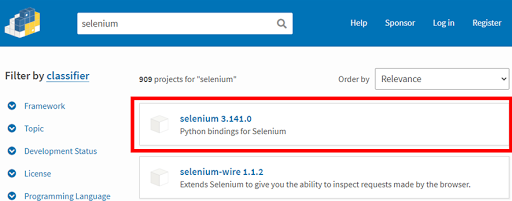
前往Python套件儲存庫PyPI(Python Package Index),輸入Selenium進行查詢,如下圖:
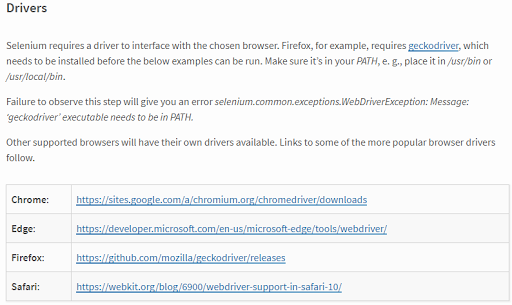
點擊進入後,往下可以看到Drivers的地方,如下圖:
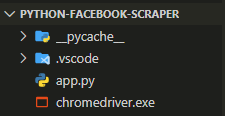
選擇要使用的瀏覽器,進行下載及解壓縮即可。完成後,建議將這個Webdriver檔放置在Python網頁爬蟲的專案資料夾中,如下圖:
三、安裝BeautifulSoup
接著,利用以下指令安裝BeautifulSoup套件:
$ pip install beautifulsoup4
四、Selenium get()方法
開啟開發工具,本文以Visual Studio Code為例,建立一個app.py檔案,引用time模組與Selenium套件的webdriver模組及Options類別,如下範例:
- from selenium import webdriver
- from selenium.webdriver.chrome.options import Options
- import time
- options = Options()
- options.add_argument(“–disable-notifications”)
- chrome = webdriver.Chrome(‘./chromedriver’, chrome_options=options)
- chrome.get(“https://www.facebook.com/”)
範例中第6、7行的options物件,主要用途為取消網頁中的彈出視窗,避免妨礙網路爬蟲的執行。
而第9行就是建立webdriver物件,傳入剛剛所下載的「瀏覽器驅動程式路徑」及「瀏覽器設定(chrome_options)」,其中的「瀏覽器驅動程式路徑」一定要傳入,而「瀏覽器設定(chrome_options)」則可視情況傳入,為選擇性的。
有了Selenium webdriver的物件後,就可以透過第10行的get()方法,前往要爬取的網頁網址。
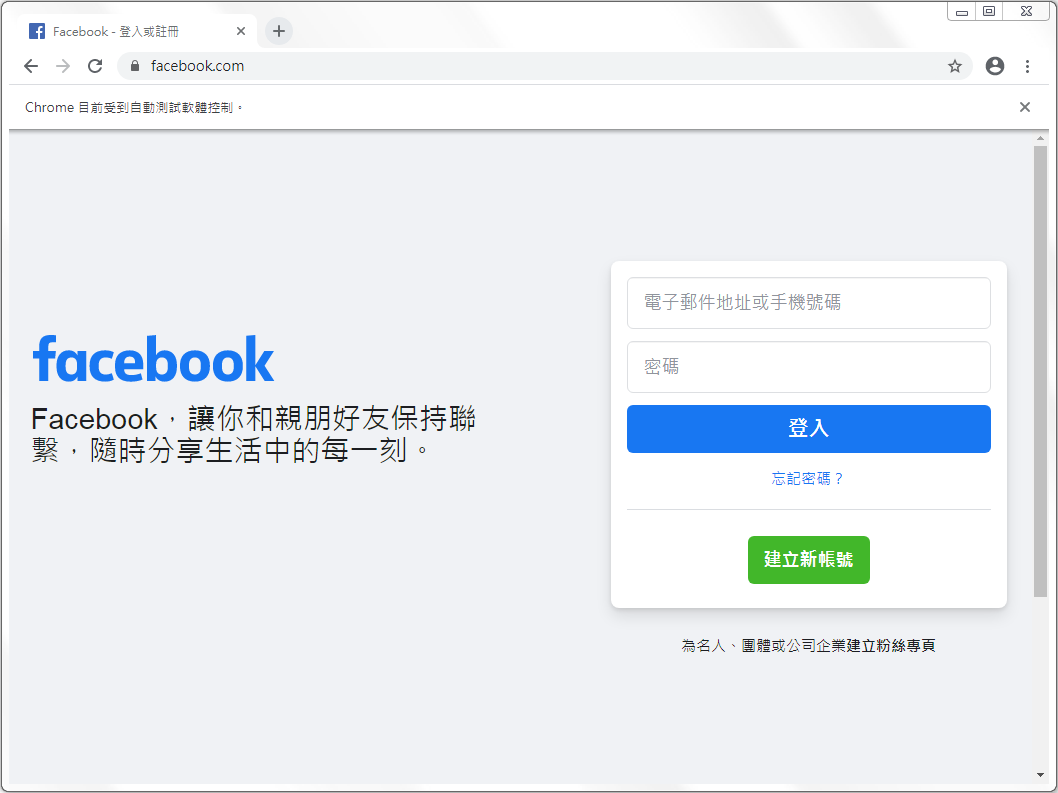
到這邊執行app.py程式碼時,就會自動開啟Chrome瀏覽器,並且前往Facebook,如下圖:
五、Selenium元素定位
到了Facebook的登入頁面後,要讓Python自動輸入「電子郵件」及「密碼」,首先需利用Selenium套件進行元素的定位,在Chrome瀏覽器按下F12後,可以看到這兩個欄位的id為「email」「pass」,如下範例:
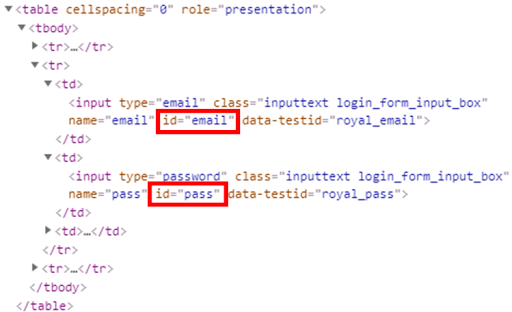
這時候,就可以使用Selenium套件的find_element_by_id方法來分別建立「電子郵件」及「密碼」的物件,如下範例:
- from selenium import webdriver
- from selenium.webdriver.chrome.options import Options
- import time
- options = Options()
- options.add_argument(“–disable-notifications”)
- chrome = webdriver.Chrome(‘./chromedriver’, chrome_options=options)
- chrome.get(“https://www.facebook.com/”)
- email = chrome.find_element_by_id(“email”)
- password = chrome.find_element_by_id(“pass”)
六、Selenium send_keys()方法
接下來,就可以透過Selenium套件的send_keys()方法,來模擬使用者輸入資料,最後,利用submit()方法送出,進行登入的動作,如下範例:
- from selenium import webdriver
- from selenium.webdriver.chrome.options import Options
- import time
- options = Options()
- options.add_argument(“–disable-notifications”)
- chrome = webdriver.Chrome(‘./chromedriver’, chrome_options=options)
- chrome.get(“https://www.facebook.com/”)
- email = chrome.find_element_by_id(“email”)
- password = chrome.find_element_by_id(“pass”)
- email.send_keys(‘example@gmail.com’)
- password.send_keys(‘*****’)
- password.submit()
七、Selenium execute_script方法
由於本文要爬取Learn Code With Mike粉絲專頁的文章標題,所以登入後,需要再一次的使用Selenium套件的get()方法前往粉絲專頁,如下範例:
- from selenium import webdriver
- from selenium.webdriver.chrome.options import Options
- import time
- options = Options()
- options.add_argument(“–disable-notifications”)
- chrome = webdriver.Chrome(‘./chromedriver’, chrome_options=options)
- chrome.get(“https://www.facebook.com/”)
- email = chrome.find_element_by_id(“email”)
- password = chrome.find_element_by_id(“pass”)
- email.send_keys(config.email)
- password.send_keys(config.password)
- password.submit()
- time.sleep(3)
- chrome.get(‘https://www.facebook.com/learncodewithmike’)
範例中第19行的sleep()方法,主要用途是暫停執行程式碼3秒,讓網頁利用這段時間載入元素,再前往粉絲專頁,避免直接執行時,如果網頁還沒有載入完成,就會發生讀取不到所要爬取的元素或網頁卡住等例外情況,所以這行程式碼可視情況使用。
20210126補充說明
在前往粉絲專頁後,如果有彈跳出聊天室窗,而妨礙Python網頁爬蟲的執行時,則可以利用Selenium套件的find_element_by_css_selector()方法(Method),傳入關閉(X)按鈕的樣式類別(class)來定位,並且呼叫click()點擊方法(Method)關閉聊天室窗,如下範例第22-25行:
- from selenium import webdriver
- from selenium.webdriver.chrome.options import Options
- import time
- options = Options()
- options.add_argument(“–disable-notifications”)
- chrome = webdriver.Chrome(‘./chromedriver’, chrome_options=options)
- chrome.get(“https://www.facebook.com/”)
- email = chrome.find_element_by_id(“email”)
- password = chrome.find_element_by_id(“pass”)
- email.send_keys(‘example@gmail.com’)
- password.send_keys(‘*****’)
- password.submit()
- time.sleep(3)
- chrome.get(‘https://www.facebook.com/learncodewithmike’)
- time.sleep(5)
- chat = chrome.find_element_by_css_selector(
- ‘.oajrlxb2.gs1a9yip.g5ia77u1.mtkw9kbi.tlpljxtp.qensuy8j.ppp5ayq2.goun2846.ccm00jje.s44p3ltw.mk2mc5f4.rt8b4zig.n8ej3o3l.agehan2d.sk4xxmp2.rq0escxv.nhd2j8a9.pq6dq46d.mg4g778l.btwxx1t3.pfnyh3mw.p7hjln8o.kvgmc6g5.cxmmr5t8.oygrvhab.hnxzwevs.tgvbjcpo.hpfvmrgz.jb3vyjys.rz4wbd8a.qt6c0cv9.a8nywdso.l9j0dhe7.i1ao9s8h.esuyzwwr.f1sip0of.du4w35lb.lzcic4wl.abiwlrkh.p8dawk7l’)
- chat.click()
PS.如果在前往粉絲專頁後,沒彈跳出聊天室窗,則無需增加第22-25行,否則會發生例外錯誤。
接著,按下F12,可以看到HTML的原始碼中,只有顯示一些文章,而不會全部載入,必須透過滾動捲軸來動態載入更多的文章,所以這時候就可以利用Selenium套件的execute_script()方法,來執行滾動捲軸的JavaScript程式碼,如下範例:
- from selenium import webdriver
- from selenium.webdriver.chrome.options import Options
- import time
- options = Options()
- options.add_argument(“–disable-notifications”)
- chrome = webdriver.Chrome(‘./chromedriver’, chrome_options=options)
- chrome.get(“https://www.facebook.com/”)
- email = chrome.find_element_by_id(“email”)
- password = chrome.find_element_by_id(“pass”)
- email.send_keys(‘example@gmail.com’)
- password.send_keys(‘*****’)
- password.submit()
- time.sleep(3)
- chrome.get(‘https://www.facebook.com/learncodewithmike’)
- for x in range(1, 4):
- chrome.execute_script(“window.scrollTo(0,document.body.scrollHeight)”)
- time.sleep(5)
範例中,使用Python的迴圈,執行滾動捲軸3次,每滾動一次就暫停執行程式碼5秒,讓Facebook載入更多的文章。
八、BeautifulSoup find_all()方法
20210126補充說明
前面透過Selenium套件進行登入、前往粉絲專頁及滾動捲軸來動態載入更多的文章,這時候就可以來查看所要爬取的文章標題原始碼,如下圖:
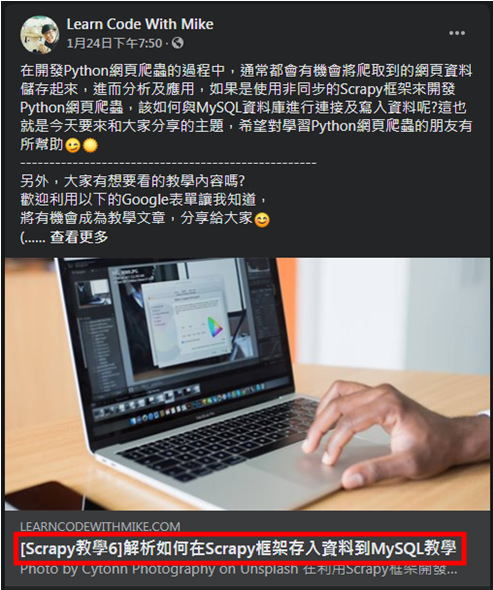
在紅框的文章標題,點擊右鍵,選擇「檢查」,可以看到它的HTML原始碼為:

將目前瀏覽器的page_source(原始碼),傳入BeautifulSoup類別,來進行解析,如下範例:
- from selenium import webdriver
- from selenium.webdriver.chrome.options import Options
- from bs4 import BeautifulSoup
- import time
- options = Options()
- options.add_argument(“–disable-notifications”)
- chrome = webdriver.Chrome(‘./chromedriver’, chrome_options=options)
- chrome.get(“https://www.facebook.com/”)
- email = chrome.find_element_by_id(“email”)
- password = chrome.find_element_by_id(“pass”)
- email.send_keys(‘example@gmail.com’)
- password.send_keys(‘*****’)
- password.submit()
- time.sleep(3)
- chrome.get(‘https://www.facebook.com/learncodewithmike’)
- for x in range(1, 4):
- chrome.execute_script(“window.scrollTo(0,document.body.scrollHeight)”)
- time.sleep(5)
- soup = BeautifulSoup(chrome.page_source, ‘html.parser’)
接著,就可以使用BeautifulSoup套件的find_all()方法,取得文章標題的元素,也就是樣式類別(class)為a8c37x1j…的所有<span>標籤,如下範例:
- from selenium import webdriver
- from selenium.webdriver.chrome.options import Options
- from bs4 import BeautifulSoup
- import time
- options = Options()
- options.add_argument(“–disable-notifications”)
- chrome = webdriver.Chrome(‘./chromedriver’, chrome_options=options)
- chrome.get(“https://www.facebook.com/”)
- email = chrome.find_element_by_id(“email”)
- password = chrome.find_element_by_id(“pass”)
- email.send_keys(‘example@gmail.com’)
- password.send_keys(‘*****’)
- password.submit()
- time.sleep(3)
- chrome.get(‘https://www.facebook.com/learncodewithmike’)
- for x in range(1, 4):
- chrome.execute_script(“window.scrollTo(0,document.body.scrollHeight)”)
- time.sleep(5)
- soup = BeautifulSoup(chrome.page_source, ‘html.parser’)
- titles = soup.find_all(‘span’, {
- ‘class’: ‘a8c37x1j ni8dbmo4 stjgntxs l9j0dhe7 ojkyduve’})
九、BeautifulSoup getText()方法
最後,利用Python迴圈讀取每一個文章標題的元素,透過BeautifulSoup套件的getText()方法,取得所有<span>標籤中的文字,如下範例:
- from selenium import webdriver
- from selenium.webdriver.chrome.options import Options
- from bs4 import BeautifulSoup
- import time
- options = Options()
- options.add_argument(“–disable-notifications”)
- chrome = webdriver.Chrome(‘./chromedriver’, chrome_options=options)
- chrome.get(“https://www.facebook.com/”)
- email = chrome.find_element_by_id(“email”)
- password = chrome.find_element_by_id(“pass”)
- email.send_keys(‘example@gmail.com’)
- password.send_keys(‘*****’)
- password.submit()
- time.sleep(3)
- chrome.get(‘https://www.facebook.com/learncodewithmike’)
- for x in range(1, 4):
- chrome.execute_script(“window.scrollTo(0,document.body.scrollHeight)”)
- time.sleep(5)
- soup = BeautifulSoup(chrome.page_source, ‘html.parser’)
- titles = soup.find_all(‘span’, {
- ‘class’: ‘a8c37x1j ni8dbmo4 stjgntxs l9j0dhe7 ojkyduve’})
- for title in titles:
- post = title.find(‘span’, {‘dir’: ‘auto’})
- if post:
- print(post.getText())
- chrome.quit()
20210126補充說明
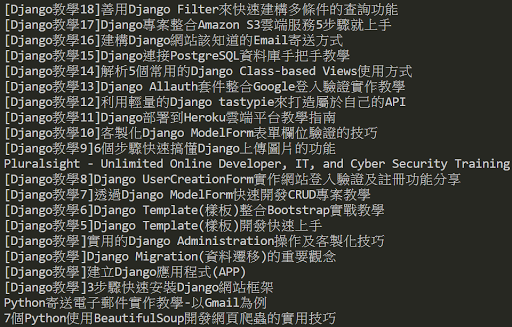
為了要更精準的爬取到粉絲專頁的文章標題,在迴圈的讀取過程中,第34行再透過find()方法(Method),取得所有樣式類別(class)為a8c37x1j…的<span>標籤子元素,第36行判斷如果不為None,則印出爬取結果,如下圖:
十、小結
以上就是結合Python的Selenium及BeautifulSoup套件實現動態登入的網頁爬蟲,完整的程式碼可以參考下方的GitHub網址,如果在實作的過程中有碰到問題,歡迎在底下留言分享。
Source: [Python爬蟲教學]整合Python Selenium及BeautifulSoup實現動態網頁爬蟲